In a country house or in the country can not do without an autonomous water supply system. The well is most often chosen as the source of water for it. Such a system is very efficient, reliable and durable.
With proper maintenance and operation, it almost does not require human intervention, but sometimes a pump is replaced in the well. How to do it right?
We will tell you how to remove an old pump from a borehole and install a new unit instead. In the article we presented, the methods and subtleties of the process are described in detail. Based on our advice, all work will be performed perfectly.
Reasons to replace the pump
Mechanisms are not eternal and sooner or later they fail. It is clear that it is necessary to replace a broken pump, which has served for several decades.
However, if equipment breakdown occurs prematurely, you should definitely find the cause. Otherwise, the new device may repeat the fate of its predecessor, which threatens the owner with unjustified costs.
You can "write off" what happened on a factory marriage. This, of course, happens, but is extremely rare. Most often, the cause of the breakdown lies in another, namely in the mistakes made in the process of arranging the well. Consider the most common.

If you have to change a pump that has not exhausted its resource, you must accurately determine the cause of the failure. Otherwise, new equipment may break down quickly for the same reason.
Errors in choosing a well model
If the parameters of the equipment do not correspond to the actual flow rate of the well, problems will arise. If the pump capacity is exceeded, the water level will often fall below the suction pipe. In models with protection against "dry running", the automation will work, the equipment will turn off. Other pumps will continue to operate.
When operating without water, which for the device is a lubricant and coolant, bearings, impellers quickly wear out and the electric motor overheats.
The same problems appear in the case of improper installation of the dry run sensor. The result is a breakdown and replacement of equipment. Another common mistake is the wrong choice of pump for pressure.
Image Gallery
Photo from
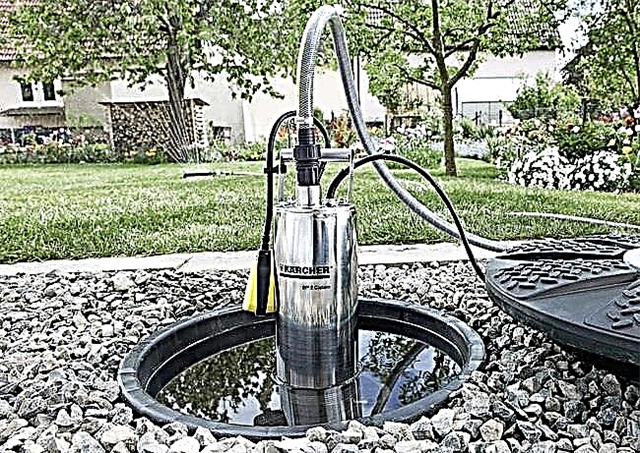
Superficial pump for shallow wells
Ejector pump refill
Depth for submersible pumps
The reason is simple: an overly powerful pump will shut off too often, which will inevitably lead to premature wear of the stator windings, impellers and even to overheating of the engine.
I must admit that this process will not go so fast, but the pump resource will be significantly reduced in any case. That is why when choosing a pump, it is necessary to take into account the relationship between water flow and productivity.
If the equipment has to raise water to a height greater than indicated in its passport, the pump will have to function almost continuously. Excessive load will quickly disable the unit.
Some owners select the pump according to the principle “more is better”. They are trying to choose a model with excess performance. This will also lead to a quick breakdown of the equipment.

Check valve is an essential element of the system. Its absence leads to premature wear of the pump, which is forced to refill the casing pipe with water each time it is turned on.
Typical installation errors
Equipment will inevitably fail if the height of its suspension is incorrectly determined. If you lower the device too low, it will suck in small pebbles or sand.If, on the contrary, it is raised high, it can “grab” air.
The absence of a check valve adversely affects the pump. In this case, after each start, it must first fill a vertical pipe with water, and after shutting off, it is subjected to water hammer. Thus, the greater the height to which water rises, the stronger the blow and, accordingly, the damage done to the pump.
An unnecessarily small diameter of the water supply pipe is also undesirable for him. The service life of the device remains unchanged, but the performance is noticeably reduced. Lack of electrical protection, especially in areas with unstable voltage, can lead to equipment damage.

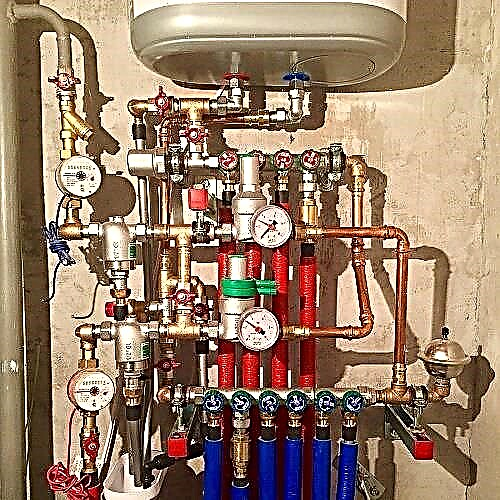
Compliance with the technological rules for connecting the pump to the well ensures trouble-free operation of the equipment (click on the diagram to enlarge)
When connecting electrical appliances, it is recommended to install stabilizing devices, for complex and expensive electrical equipment - special control and protection stations. The cross-section of the supply cable must be sufficient, otherwise the motor service life will be significantly reduced.
Improper installation of automation and instrumentation is another problem leading to an accident. The minimum set of devices for a full-fledged water supply system with a storage tank and a pump looks like this: a dry-running sensor, if it is not included in the package of the pump, relay, pressure gauge, automatic shut-off / on switch.
The correct installation of the pump also affects its service life. The non-return valve must be mounted between the supply pipe and the pump.

In order for the pump to serve for a long time, you need to regularly, approximately once a month, check the pressure level in the pneumatic accumulator element and, if necessary, pump it
In this case, the pipe diameter must exactly match the size of the connecting thread on the equipment. When starting the pump, the electric cable and cable must be fixed to the water pipe.
This should be done with twisting, and not, for example, electrical tape. This is the only way to obtain a movable joint, which, when thermal deformations occur, will allow the cable to move.
Image Gallery
Photo from
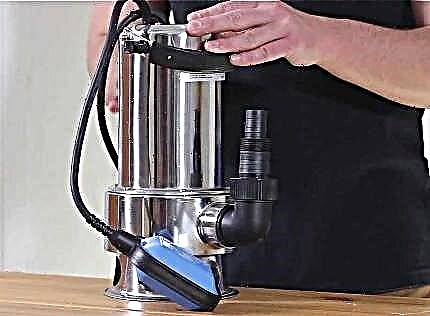
Submersible pump preparation
Check valve connection
Clamps for additional pump mounting
Pipe connected pump
Pump automation device
Pressure Switch Installation Rules
Hydraulic tank to work in tandem with a relay
Common downhole pump failures
Violation of the rules of operation
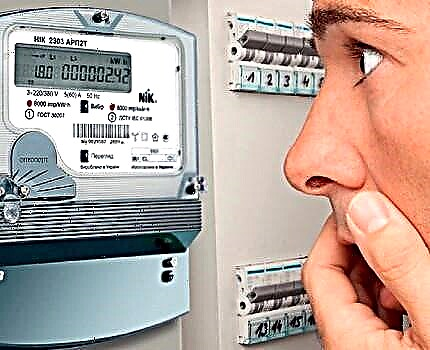
During the operation of the equipment it is very important to monitor the correctness of the pressure switch settings set for automatic control of the system. They must be correctly exposed during installation and constantly monitored, because during the operation of the equipment they can go astray.
Periodic system maintenance must not be neglected. You should regularly check the pressure in the pneumatic element of the accumulator. It must exactly match what is indicated in the passport.
On average, the pneumatic element is pumped once a month. If you do this less often or not at all, the pressure will change, and the pump will turn off / on much more often than necessary. The result will be premature wear of the element and failure of the pump.

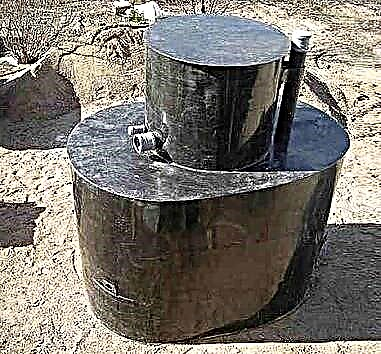
The figure shows a diagram of the arrangement of a water supply system from a well. It becomes clear why the pump must be taken out of the well very carefully. If it breaks or gets stuck, it will be very difficult to remove it, in some cases it is impossible
How to get a pump out of a well?
Despite the apparent simplicity, this is a rather complicated and responsible procedure. Moreover, its complexity will largely depend on how deep the equipment is fixed. Experts share three levels of complexity of such work.
It should be understood that it is not so much the depth of the water well itself that matters, but the water level in the casing, that is, the dynamic and static level. For example, in a well with 120 m depth, the static level may be at around 10 m. Then the pump will be installed at a depth of about 20 m, which will greatly facilitate its rise.
The simplest option is the dismantling of equipment located at a depth of 30 m. The design of the pump and pipes in this case has a relatively small length and weight, which allows it to be removed to the surface by 1-2 people.
Pumps installed at a depth of 30 to 100 m are much more difficult to lift up. The length of the pipe and pump structure is much longer, its weight is also increasing. In addition, the lower the pump goes down, the more powerful it is and, accordingly, heavier.
We must not forget about the mass of water filling the pipe. Thus, the weight of the system is significant. Raising the pump alone will not work. It will take the help of several people and special devices: a winch or a manipulator.

The deeper the well, the greater the weight of the pipe, cable and cable structure mounted on the pump. Without the help of special devices, you can remove the pump from a depth of not more than 30 meters, in other cases you need a winch or crane
Equipment submerged more than 100 m into the well is most often lowered onto galvanized or stainless steel pipes. A variant is also possible with HDPE pipes with a pressure of 16 atm.
For such structures, reinforced heads and a safety cable with a larger cross section are used. Thus, their weight is very large. For dismantling a truck crane or a special winch is required.
The pump lifting procedure is quite simple. We start by turning off the power supplied to the equipment. After that, we unscrew the water pipe at the junction. Now you can start the climb.
Slowly and very carefully pull the pump to the surface, insuring it with a cable. To avoid problems, pull gently but continuously.
What to do if the pump is stuck?
The biggest nuisance that can happen when lifting a pump is getting stuck or falling into a well. In severe cases, this may result in the need to drill a new well, since it will be impossible to use the old one due to a pump stuck in it.
However, you should always try to remove the pump. Let's talk about how to do it right.
Often, when the pump is raised, a slack in the cable forms, forming a loop. It can overlap around the device and wedge between it and the well wall. In this case, it is unlikely that anything will help. The situation can only be warned.
To do this, carefully monitor the rising structure and prevent the appearance of slack in the cable. In addition, it must be fastened to the pipe.

Slack that appears in the electrical cable can cause the pump to become stuck in the well. The situation is easier to prevent than to correct, so it is important to prevent its occurrence.
It is important that the cable and the pipe and cable come to the surface at the same time, without noticeable slack. If it still appeared and the pump got slightly jammed, we take the pipe and slightly push the equipment down. Then we select the slack and slowly continue the rise. If the pump no longer goes down, leave it in the position in which it has jammed and call a specialist.
It may turn out like this: the pump came out easily and without problems. Suddenly, he stopped moving up, as if he had run into an obstacle. Most likely, the equipment came across a ledge inside the casing. It can be welding residues or a split joint.
In this case, a blow to the edge of the protrusion will be clearly felt, the pump will fall down easily. A dent on the wall is also possible.There will be no impact, and the device will fall down with difficulty.
To remove the pump, you can advise this method. Gently rotating the device by the hose around its axis, slowly pull it up. If you are lucky, the device will slip around the obstacle, go around it and pass the problem area.
An object, such as a screwdriver or a wrench, may accidentally fall into the well. The gap between the pump and the borehole wall is so small that the foreign body that gets into it will immediately jam the equipment.

It is very difficult to get a pump silt in the well. It is necessary to carefully swing the device so that the water falling under it gradually erodes the plug from the sludge
In this case, the pump will easily fall down, and will not be able to move up. You should select the slack of the cable, slightly tighten it and securely fix the jammed pump.
Further work should only be carried out using special equipment. In a rarely used well, sanding of the pipe above the pump may occur on the sand. To extract it yourself, you should use the buildup method.
To do this, we evenly loosen, and then pull the cable on which the device is mounted. It is necessary to at least slightly tear the pump off the bottom, in this case, water will fall into the resulting gap. It will dilute the sludge when lowering / raising the equipment and it will most likely be able to be pulled out to the surface. It is very important to do everything carefully, without unnecessary efforts that can break the cable.
Image Gallery
Photo from
stuck pump extractor
How to make a fixture
Deep centrifugal pump
Vibrator extracted from the well
If all else fails and the pump remains in the well, you need to call specialists. They should have devices for video diagnostics to help determine the cause of jamming, and special tools.
The same should be done when the pump falls into the well. It can be removed only with the help of special equipment. In the most hopeless case, you can try to destroy the jammed device with a drilling machine. True, this is an expensive and rather risky operation.
Proven ways to remove the pump from the well in the event of jamming it in the barrel are given in the next article, which we recommend reading.
What to choose: repair or replacement?
It should be understood that the cause of problems with filling the accumulator or storage tank is not always the reason for the pump. It is possible that the automation settings were lost or it failed.
There might have been leaks in the water supply pipe, or the well just got silted up. Therefore, we raise the pump only after we eliminate the breakdown of the accumulator and automation.

In some cases, the pump can be repaired, so if the device has worked out a little, it is worthwhile to diagnose it in the service workshop. Perhaps he will still serve
After removing the equipment from the well, it is worth checking its operability by lowering it into a container of water. Thus, it will be possible to see if the electric motor works and how water is supplied.
It is clear that only specialists can carry out adequate diagnostics, but it will be possible to understand whether it is necessary at all. In addition, low suspended vibration pumps are often clogged with sand.
To bring the device back to life, it will be quite enough to disassemble the case and shake the pebbles clogged under the valve from it. In case of wear, it may be necessary to replace the valve itself, but it is very simple and cheap.
After diagnosing the pump, you can decide whether to restore or replace it. It is clear that if the mechanism has served for 10 or 15 years, the wear of the parts is great and it only needs to be changed.

Sometimes it happens that in order to return the pump to life it is enough just to clean it from sand and pebbles that got inside
When choosing a new mechanism, all the nuances should be taken into account.In order to prevent the errors described above, which lead to a quick breakdown of the device, you need to adequately choose a pump. Its technical characteristics must exactly match the capabilities of the source and the needs of the apartment building.
Installing a new pump
Before launching a new pump into the well, you should insure yourself against possible troubles associated with its future rise. First of all, you need to know that the larger the gap between the pump and the casing wall, the less likely it is to jam equipment in the well.
Well-known manufacturers offer special models of minimal thickness. It is clear that their cost is higher. However, the price difference is not comparable with the cost of repair work with a possible jamming or even drilling of a new well.
In addition, you can not try to save on the cable on which we will hang the pump. Never use steel wire, galvanized or plastic sheathed cables in this quality. Chains or ropes are also not good.

To suspend the pump in the well, you can take a stainless steel cable or, if there is concern that it might break the body mounts, a strong nylon cord
You should buy the right amount of high-quality stainless steel cable and a set of fasteners for it. This will eliminate unnecessary repair costs in the future. Experts insist that the use of spliced cables and hoses in the well is a big risk.
There is no guarantee that during the subsequent pump lift they will not disperse, the fragment will not wrap in the direction of the well and will not jam the equipment. Thus, the fewer compounds, and ideally there are none at all, the better.
And one more nuance. Installation of the head on the well is mandatory, otherwise small and large debris will inevitably fall into it, which is extremely undesirable.
After the necessary materials and equipment are purchased, you can begin to work. The necessary actions are performed in this sequence.
Casing Inspection
Before starting the pump, be sure to check for any curvature, bumps or narrowing on the casing walls. Such defects can seriously complicate the installation of equipment and affect the term of its operation. With a small gap, it will be quite difficult to lower the pump into the well; problems with its operation will also arise.
Large clearance is also undesirable. In this case, the pump will not be able to provide the desired speed of the water cooling its engine. Therefore, the minimum permissible values that the manufacturer indicates in the equipment documentation must be strictly observed.

Before lowering the pump into the well, two rubber rings can be put on its casing. This will prevent equipment from impacting the casing walls.
Preparing the pump for a run
We take the equipment and fix it to the cable. If there is concern that the cable during operation of the pump may break the mountings on the housing, we use a strong nylon cord as a suspension.
We choose one that can withstand a breaking load of at least five times its weight. If the depth of the well is large, you can duplicate the suspension with a safety element.
We knot the knot on the suspension cable so that it is at least 10 cm from the pump inlets. Otherwise, the equipment will suck it up. The ends of the cord are cut off and necessarily melted.
On the device, which we will lower to a depth of less than 10 m, you need to additionally fix the spring suspension, which will dampen the vibration. For these purposes, a flexible rubber tape or conventional medical tourniquet is used.
An electric cable, a metal-plastic pipe and a suspension are fixed with each other by twisting. The step between the fasteners should be at least 80-130 cm. In this case, we make the first bundle at a distance of 20-30 cm from the pump nozzle.
Connecting a submersible pump to a well is correct without using a threaded joint, which undergoes corrosion failure and reduces pipe strength. It will optimally make flange connections. They are more reliable and last much longer.
When fastening, a bolt must be inserted from above, and a nut from below. This is done so that subsequently the bolt does not fall under any circumstances into the well. Because it can cause a serious accident.

The descent of the pump into the well must be carried out very carefully and accurately. The device must not touch the walls of the casing
Mounting the pump unit in the barrel
Finish the preparatory work. We attach the upper part of the discharge pipeline to the base plate. If the pump is not equipped with a check valve, install it here. Then we put the valve, knee and pressure gauge, after which we connect the equipment to the system.
Then the suspension assembled from the cord, pipe and cable is lifted and fixed on a pre-installed crossbar. We proceed to the descent of the pump. The operation is carried out very carefully. The equipment must not touch the walls of the casing.
If it is clear that this cannot be avoided, it is better to make sure to protect the case with a rubber ring. Lower the pump to the desired depth. It should be below the dynamic level of the well by about two meters. It should be remembered that at least a meter should remain to the bottom.
The minimum mark at which the pump can be lowered is 0.3 m below the dynamic level. Such a depth will be sufficient to allow the appliance engine to cool properly. Optimal for the pump is considered a depth of 2-3 meters from the dynamic level.
To measure the water level in the well, we put in the hole in the base plate a column of gas pipes. We lower it below the dynamic level.
After we lowered the pump to the desired depth, securely fix the suspension. Then we take a megohm meter and take measurements to determine the insulation resistance on the motor winding with the cable down. And we connect the control station to the pump, once again we check whether it is lowered to a sufficient depth. Next, we do a test run of the new pump.

After the new pump is lowered into the well, it is connected to the automation and the accumulator, then a test run is carried out
We evaluate the operation of the device, we pay special attention to how correctly the electric motor functions under load. If any shortcomings are identified, we immediately eliminate them and once again check the operation of the equipment. We install the top cover of the head at the wellhead and tighten the bolts, reliably closing the device. Now, neither debris nor surface water can get into the structure.
How water intake maintenance is performed is described in detail here. Operating instructions should be read to avoid situations requiring removal of the pump and barrel cleaning too often.
Video # 1. How to prepare the pump for the descent into the well:
Video # 2. Well pump replacement:
Video # 3. How to install a downhole pump into a well:
Replacing a downhole pump is a rather complicated and responsible operation. It is important to remove used equipment from the barrel so that it does not get stuck or fall down. Otherwise, it will be impossible to operate the well.
The new pump should be lowered and connected in strict accordance with the recommendations of the manufacturers. Only then will the equipment serve for a long time and without problems.
Please leave comments in the block below. Write how you got the pump out of the barrel of your own well in the suburban area. Ask questions, share useful information, post photos and posts with your opinion on the topic of the article.